I love to share photos. As a chaperone on a school trip to Washington DC, I figured it would be simple to shoot the trip and show our progress live on a WordPress site as gallery posts for each location.
There should be an ‘app for that,’ but I couldn’t find one. I’ll describe the steps and tools I used to enable photoblogging from my phone. You will need to use two apps — WordPress (free) and PUPS (cheap) — plus the web interface of WordPress. The tools I used to get photos off my Canon EOS 5D are listed in step 4.
Three setup steps that won’t have to be repeated:
1) Setup WordPress
Either get a free wordpress.com site or follow this guide to setup your own self-hosted site in 20 minutes. The rest of the steps show self-hosted, but WordPress.com also works.
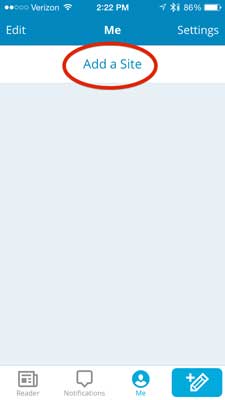
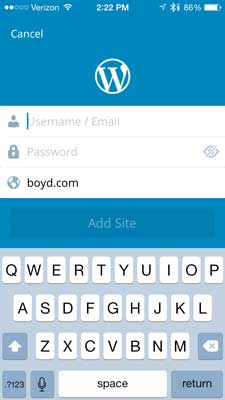
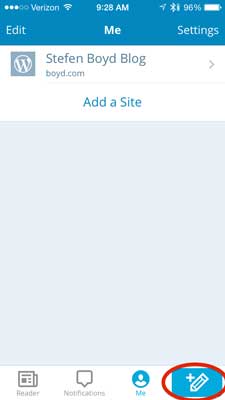
2) Setup WordPress app
You will need to add your blog info. Select ‘Add Site’ under ‘Me’ to add the username, password and site address:
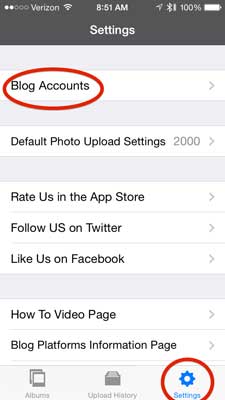
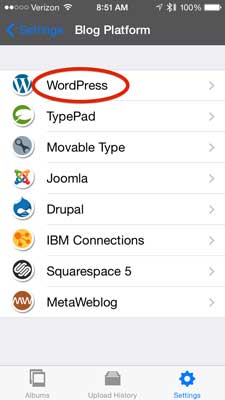
3) Setup PUPS app
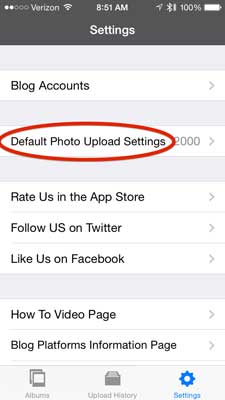
Under settings select ‘Blog Accounts’:
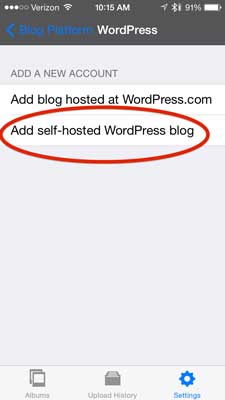
Then select ‘WordPress’ and ‘Add self-hosted WordPress blog’:
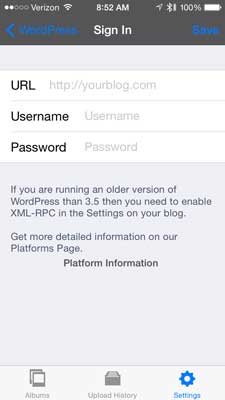
Fill in your site info and save. Change the upload resolution (the maximum height or width of any photo uploaded) if you don’t like the default:
Only 4 steps remain for your first gallery post:
4) Getting photos into your iPhone
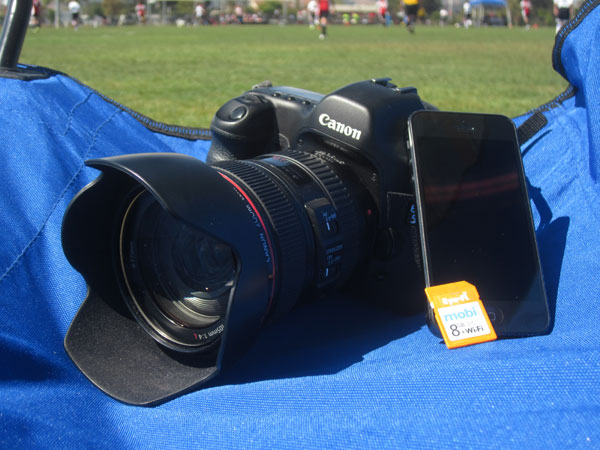
If you are taking photos using your iPhone camera, you’re ready to move on. I shoot with a Canon EOS 5D and use an Eye-Fi mobi SD card, CF Adapter, and free Eye-Fi app to get photos into the iPhone.
This does drain your battery faster, so travel with a spare. Newer Canon models are able to communicate with the Eye-Fi card for additional features. They can keep the power on until the transfer is complete or turn off Wi-Fi when you know you won’t be transferring images.
If you have never used your Eye-Fi app before, you’ll have to enter the card’s activation code from the SD card package. Select the Eye-Fi card in your Wi-Fi settings. Once the checkmark shows it connected, you can open the Eye-Fi app and images will transfer from card to phone:


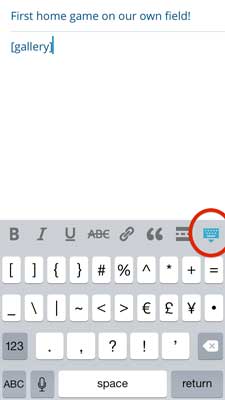
5) Create post in WordPress app
Press new post button to add a post:
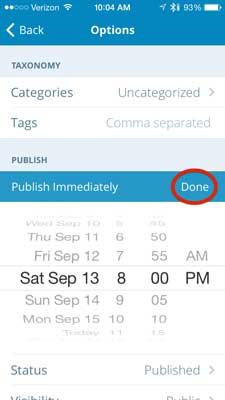
Add the title to your post and add the ‘[gallery]‘ shortcode (bracketed keywords substituted for special elements) and close the keyboard. You may want to update options before selecting ‘Publish.’
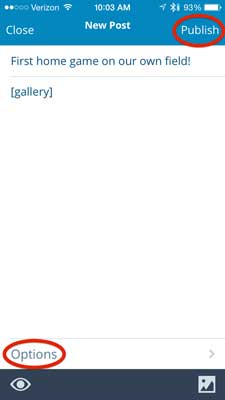
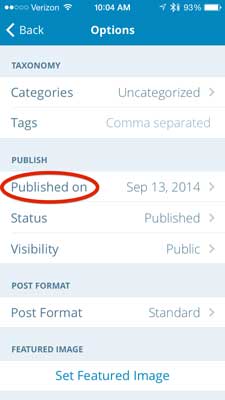
I sometimes want to backdate a post (since we’re just posting pictures) to reflect when they were taken:
I have tried using the WordPress app to add photos, but don’t because:
- it is limited to 4 photos
- gallery order is upload order and that is random
- photos can’t be resized to reduce data use
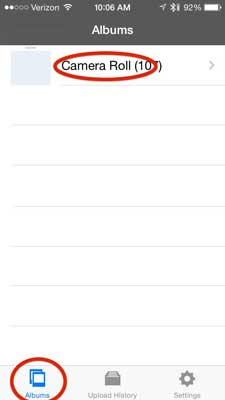
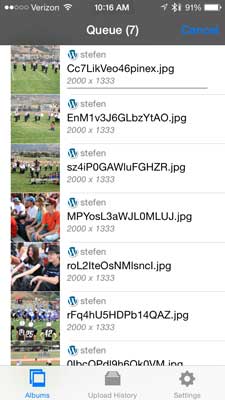
6) Upload photos
Select ‘Albums’ and your ‘Camera Roll’ and then select all the photos you want to include in your post’s gallery and choose ‘Next’:

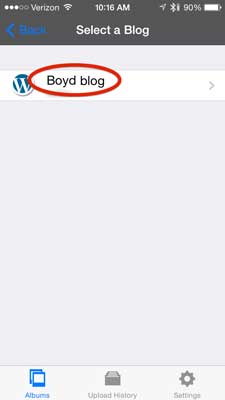
Select your blog and then ‘Upload’:
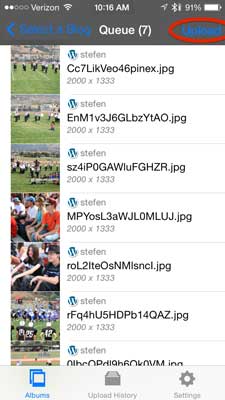
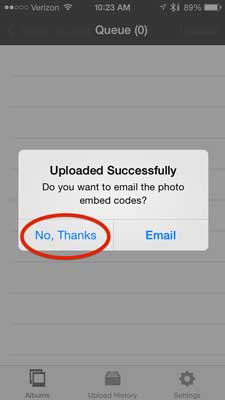
You will see progress and a final popup asking if you want email with embed codes. These aren’t required for gallery posts, so select ‘No, Thanks’ option:
7) Attach photos to post
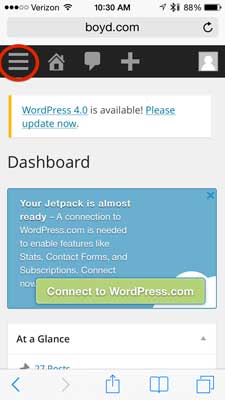
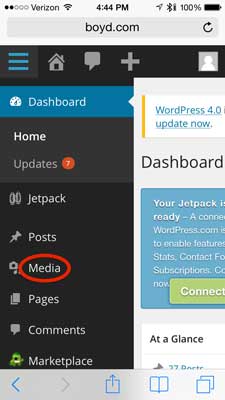
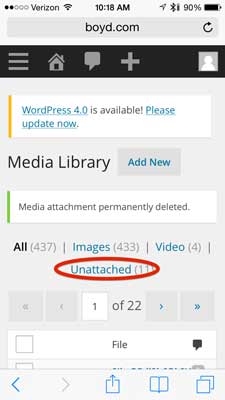
Neither the WordPress app or the PUPS app associate (‘attach’ in WordPress lingo) the photos you just uploaded with a particular post. Thus in order for us to get these photos to show in our gallery, we need to attach them to our new post. First we’ll login to our site at http://yoursite.com/wp-admin from your phone and that will bring us to the dashboard. Select the menu and then ‘Media’:
In the media library, select ‘Unattached’ photos. These are the ones we want to add to our new post:
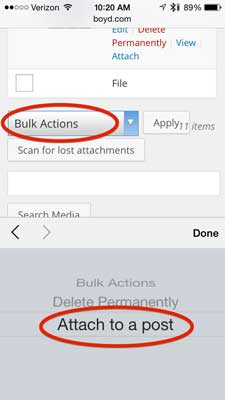
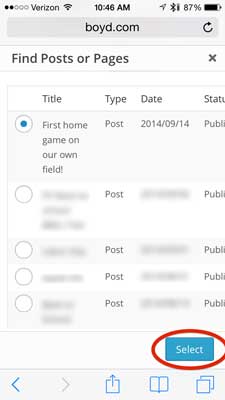
After selecting all the photos to attach, go to the bottom of the page and select ‘Bulk Actions’, choose ‘Attach to a post’ and press ‘Apply’. Select the new blog entry, scroll to the end of the page, and press ‘Select’:
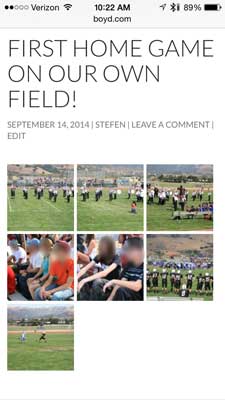
Now check (and share) your post…
I still wish I had one app that could do it all… but for now, this enables me to photoblog from anywhere.
Do you photoblog or would you if you could do it from anywhere?


Recent Comments